Needed:
glass etching cream
paint brush
contact paper (it doesn't matter the color, I went with something that you could see in pictures)
Exact-o
marker
printed letters/name/whatever you want to etch
whatever it is you want to etch the name onto
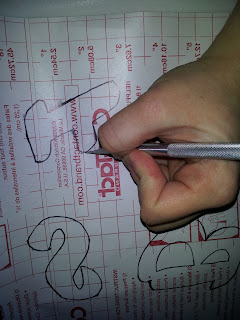
I decided to put initials onto Pilsner glasses. Lay the letters on the back of the contact paper. Make sure they are backwards!
Trace the letters with a marker and cut them out with the Exact-o knife.
Set the letter aside, you won't need it. Cut an area larger than the letter from the contact paper.
Place it onto the glass.
Brush on a thick layer of glass etching cream.
If you're using glasses like I did, make sure you keep them laying down. The etching cream will run & can get below the contact paper. Then you'll have a weird dot in the middle of the glass that wasn't supposed to be there. My etching cream bottle read to wait 60 seconds before washing it off. I found it works even better if I left it on for 2 minutes.
One thing to keep in mind is that if you have letters with negative space within the letter (A, B, D, O, P, Q, R) be sure to cut out the negative space & put that extra piece of contact paper on the glass so that the "hole" will appear on the glass as well.


No comments:
Post a Comment