Search This Blog

Wednesday, February 29, 2012

Cake Batter Pancakes

A classmate bragged about the b-day breakfast she made her husband. So guess who had to give it a go...

Man, they were yummers!


Needed:
1 1/2c flour
2/3c yellow cake mix
1Tbsp sugar
3/4tsp baking powder
pinch of salt
1tsp vanilla
2 eggs
1-2c milk
sprinkles
Combine flour, cake mix, sugar, baking powder, and salt in a bowl. Add 1c milk, eggs, and vanilla and mix until smooth. Start with a cup of milk, but add more as you need. You want it to be consistency of regular pancake mix.

Preheat your skillet. Fold in sprinkles into the batter. Cook as normal.

Want to make it a little more special? Pour the batter into squeeze bottles & squeeze the batter into shapes and letters.

Oh--one more thing!
The glaze!

1c powdered sugar
1/2Tbps milk
1/2tsp vanilla
sprinkles

Mix the sugar, milk, and vanilla together into a glaze. Stir in sprinkles.

Pour over pancakes.

Oh my gosh! So good! ....be right back...gotta make some pancakes!

Monday, February 27, 2012

craft storage

Thanks for excusing my long absence. I missed blogging & I hope you missed me!

I recently decided I need to organize my craft stuff a little better than my current system.
Current system:
Source
New system:


Hey, it's a start.
I found these wooden drawers at a craft store in town. 

I then painted the outer part blue. Did you know you could water down acrylic pain & make it go on a little easier? Well, now you do. Then I used some stencils found at Wal-Mart to create a little design with gray paint.

I painted the drawers & now it's holding all my stuff!

Monday, February 20, 2012

Taking a break

My husband and I went out of town for the extended holiday. This week is also mid-terms. I am too busy studying and finishing up projects for school to work on any crafts or new recipes. I promise to be back next week though. In the meantime, please visit some of my favorite blogs:

Kitty Cats and Airplanes

Fake It Frugal

This one isn't for crafts or recipes or anything like that. Kjerstin decided to live without mirrors for one year to see how her self-image and confidence would change. It's almost the end of her journey, but she has gained some interesting insights.

That should keep you busy until I come back. I could also use some prayers for mid-terms. Even if I don't do well, I hope to maintain my sanity!

Friday, February 17, 2012

Feather Necklace

I didn't realize how long it's been since I posted a craft! My apologizes. Hopefully this:
The necklace, not the mannequin. 
will make up for it.
Remember when my camera ate the pictures of my brown sugar apples? Yeah, well, I was doing this at the same time so all pictures are kaput. However, if you click on the pictures that are posted, you can get a bigger view of the images. Sorry!

Needed:
1 meter in chain
2 feathers
spray paint
2 crimp beads
2 jump rings

Spray paint the feathers. I chose silver. I don't like the way gold looks on me.
Once dry, apply a crimp bead onto each feather. There are several different styles, I think these
Source
are easier to work with, especially since I'm new at making jewelry.
Using jump rings, attach the crimp beads to the necklace.

Wear that bad boy!

I found the craft feathers worked okay, you just have to make sure to choose some stiff ones. The spray paint can make the fluffy ones do weird and ugly things.

Wednesday, February 15, 2012

Apple Non-Pie

As a general rule, I don't like pie. I don't know many people who don't, but I may start a club. Let me know if you want to join.
However, there's nothing more American than apple pie. Well, maybe baseball.
Source How convenient.
To help with my aversion to pie, I make a non-pie. Same basic idea, just not in pie shape with a soggy bottom (maybe that's my aversion to it).

You'll need:
2c brown sugar apples
1 refrigerated pie crust
1 beaten egg


Preheat oven to 350F. Unroll crust onto greased cookie sheet. Place apples on top in middle leaving plenty of room of the sides (about 3-4 inches).

Cut the sides of the crust every inch or so. Overlay the slices creating a braid-like effect.

Brush with egg and bake for 20-30 minutes.


Monday, February 13, 2012

Brown Sugar Apples

I love my slow cooker! This is the one I have:
(Source) 5 quarts of wonderful!
If you don't have one, please invest in one. It's one of those things you don't think you necessarily need, but once you get one you don't know how you lived without it. To entice you, here's another recipe for a slow cooker: Brown Sugar Apples. I found this recipe on Fake It Frugal which gives tips on how to save money making knock-offs of everything from Bisquick to Windex.

You'll need 3 pounds of apples (I've made this with several different kinds and they all tasted yummy so just go with your favorite), 1 cup brown sugar, 1/2 cup water, 1 teaspoon cinnamon, 1/2 teaspoon nutmeg, and 1/2 teaspoon ground ginger (not the fresh stuff). You'll also need 4 Tablespoons corn starch which I forgot to include in the picture.

Peel, core, and slice your apples.

Place all the ingredients in the slow cooker, adding the water last to help dissolve the sugar.

Cook on low for 4 hours stirring once every hour.

(Note: This is where my computer or memory card or camera--in other words something complicated I don't understand--lost my pictures. You'll just have to rely on my instructions for now. I'm SO sorry!)

Turn off slow cooker and let cool. Separate the apples from the sauce and place the sauce in a sauce pan. Add the corn starch and cook over med-high until thickened. It should coat the back of a spoon.

Add the sauce back to the apples and let cool. The sauce will continue to thicken as it cools. You can put the apples in plastic freezer bags to keep for pies or anything else that calls for apple pie filling and it's so yummy on its own! Stay tuned to find out what I did with mine!

Friday, February 10, 2012

Sweets for Your Sweetie: Lemon Lime Cupcakes

You could make this into a cake, but cupcakes are easier to handle and they help with portion control. I mean you still have to exercise some self-control, but it's easier than if you cut your own slice of cake.
This is not portion control.
You'll need: 
cupcake liners
box lemon cake mix
box lime jello mix
jar frosting
2Tbsp lemon juice
eggs, water, oil according to cake mix instructions


Preheat oven according to cake mix box. Prepare cake mix according to box, but also include lime jello mix.

Pour batter into cupcake liners. Bake according to cake mix box.

Whip frosting with lemon juice. I added a bit of yellow food coloring.

Spread onto cupcakes.

Enjoy!--The frosting can be dyed red, but you risk a Christmas-y look.

Wednesday, February 8, 2012

Sweets for Your Sweetie: Butterfingers

I have a weakness: the combination of peanut butter and chocolate. I can't resist it! Butterfingers are probably the worst though. I found a recipe from Tasty Kitchen that is so easy that I might actually make these again. And again. Then probably once more just for practice.

You'll need:
9 oz candy corn
9 oz peanut butter
bag of milk chocolate chips
Melt the candy corn in the microwave in 30 second intervals. You want it smooth & a little runny. Stir in the peanut butter and mix well. Pour into a lined 8x8 pan.
Pop in the freezer for about 20 minutes then cut into bite-sized pieces (I just eyeballed it). Melt chocolate in microwave in 30 second intervals until smooth. Dip the peanut butter pieces in the chocolate then place on wax or parchment paper. Put in the fridge for about 10 minutes or until set.
I'm not that great with dipping things into chocolate. In fact, I kind of get it everywhere and end up with a giant mess. I'm kind of cool with that. It ensures my food looks homemade :)

Monday, February 6, 2012

Sweets for Your Sweetie: Toffee

I love toffee! I usually make it around Christmas, but since I love it so much, I thought it would appropriate to start our Sweets for your Sweetie series with this.

Doesn't it look divine?
Toffee scares some people, but I'm going to walk you through this. It's so much easier than you'd expect and I'm here for you.

Needed:
1c sugar
1c butter
3Tbsp water
semi-sweet chocolate chips (I'll explain amount later)
cookie sheet lined with wax or parchment paper
Pour sugar, water, and butter into a heavy-bottom sauce pan. Cutting the butter into chunks helps with the melting process.
Heat on med-high and stir constantly. Even when it looks a little scary like this:
keep stirring. Don't scrape down the sides of the pot. Just sit there and stir. It will get foamy and that's okay. It will eventually start to turn colors. You want a nice amber color. Once it starts to turn colors, it will turn amber rather quickly. Pour onto the paper-lined cookie sheet. Do not scrape the sides of the pot! Scraping during the cooking process or while pouring it out will cause the toffee to crystallize and it is not a pleasant thing. You may have to help it along after it's poured by spreading it out a bit.
Let it sit for about 10 minutes. While it's still warm, sprinkle chocolate chips on top. You really have to eyeball it and it depends on how much chocolate you want on the finished product. I like a little more toffee than chocolate. My husband likes a little more chocolate than toffee. When I make it to give away it pretty much looks like this:
Let the chocolate sit for about 5-10 minutes. You want the chocolate to melt. You can tell it's ready when the chocolate looks shiny. When it's melted, spread the chocolate around with a butter knife or spatula. If it needs a little help, place the pan the oven or on top of a running dishwasher. The oven will help trap the heat from the toffee and the dishwasher will help keep it warm.
Let sit for a few hours. I usually make this right before bed then let it harden overnight. Break into pieces then enjoy! 

Friday, February 3, 2012

Strawberry Cream Cheese Danish

I keep telling you guys I love breakfast foods. Maybe one day you'll believe me.
Have you met the Dubiens? You should.

You'll need:
1 can refrigerated bread sticks
1/2 pint (roughly) strawberries, washed, hulled & sliced
1 block cream cheese
1/2 + 3Tbsp powdered sugar, kept separate
1 egg, separated
2Tbsp milk

Preheat oven to 350. Beat cream cheese, egg yolk, & 3 Tbsp sugar until creamy.
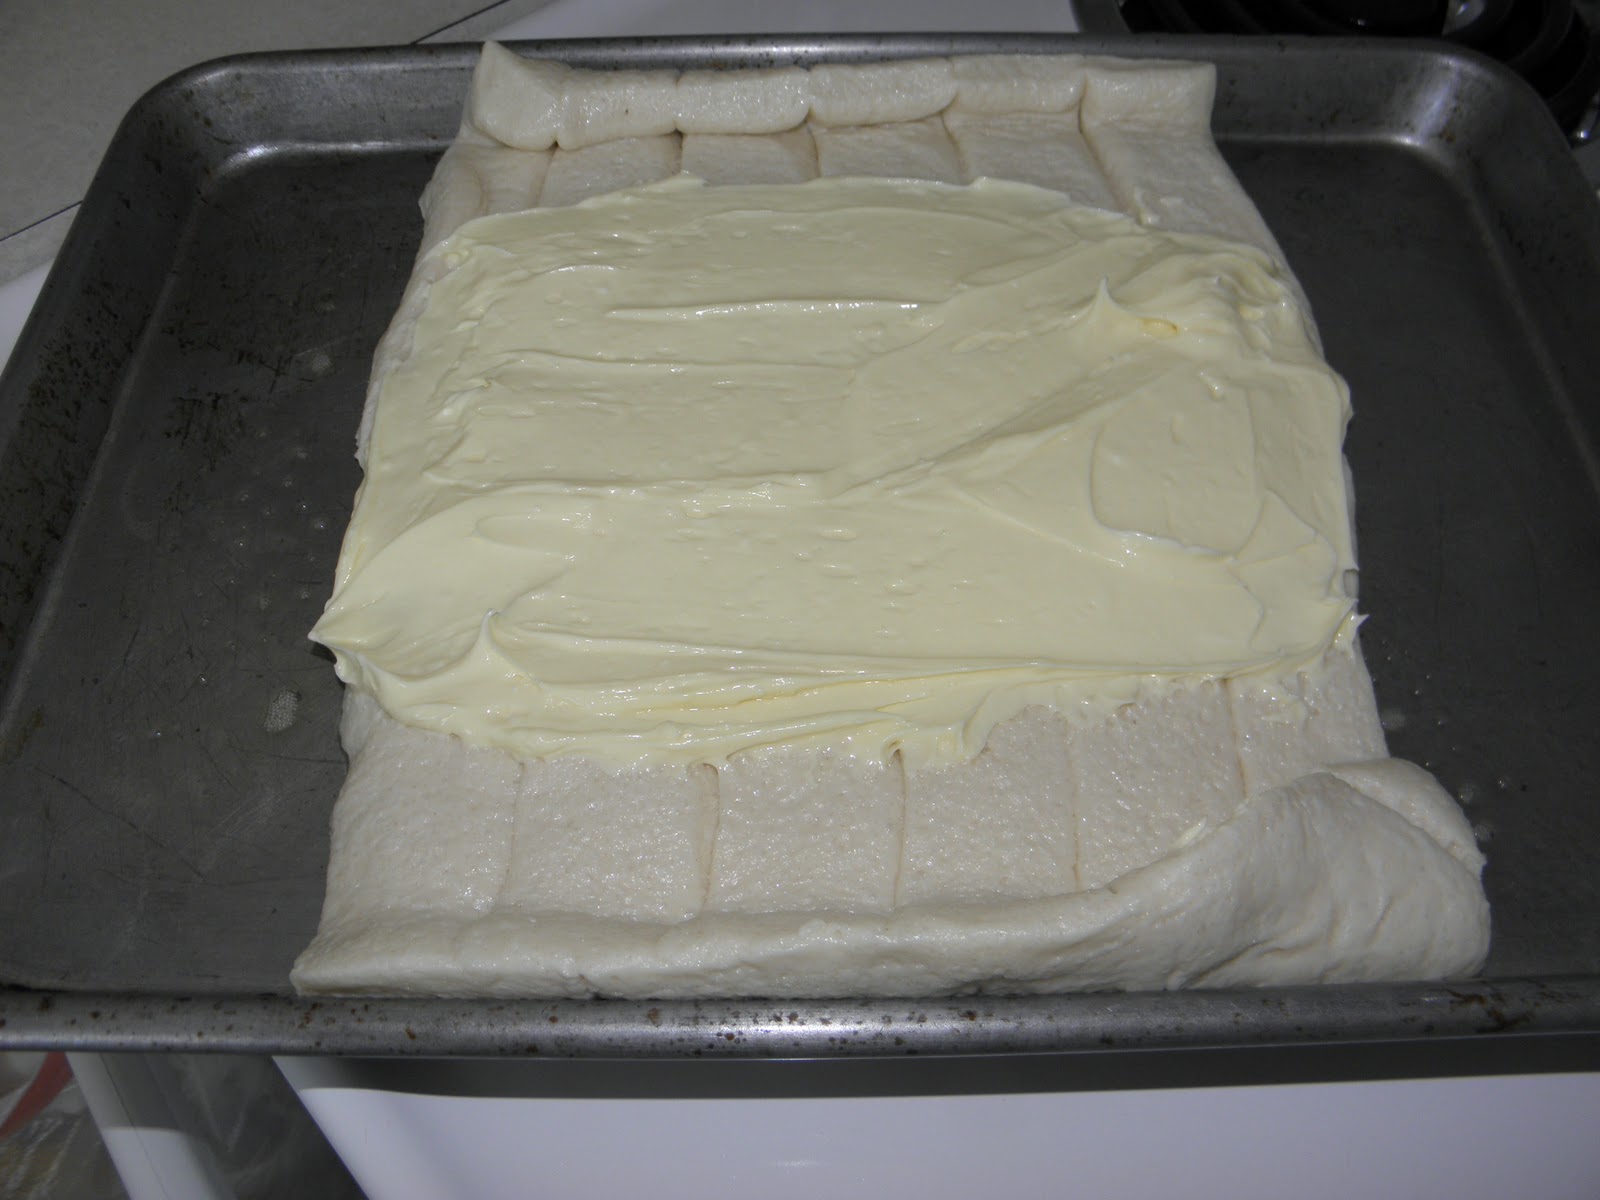
Unroll bread sticks onto greased pan, making sure to keep the seams together. Roll to make sure center seam is sealed.
Spread cream cheese mixture on top, but only in middle.

 Layer sliced berries on top making sure not to overfill (a single layer works great). Also, I used strawberries, but you can really use any berries you like or leave them off all together.
Separate each bread stick and pull over to cover the filling. Brush with beaten egg white.
You can braid it & make it all pretty if you like. As you can
see I tried...it didn't turn out so well & I got frustrated with
it & gave up. I just wanted to eat the darned thing!
Bake 20-30 minutes until browned. While cooking, mix 1/2 cup powdered sugar with milk.
Once browned:
allow to cool for about 5 minutes then pour on glaze.
By the way, thanks for all the views! It's exciting to see the numbers go up. I don't know who you are, but I appreciate you!

Wednesday, February 1, 2012

Cheesy Potato Bites

I love cheese! I love things that are cheesy! That's why this is perfect!

You'll need:
4 potatoes
1c shredded Cheddar cheese
1c shredded Mozzarella cheese
4oz bacon pieces--you can cook it yourself if you like. Just for the love of God don't use Bac-Os!
1/2 stick melted butter

Preheat oven to 350. Wash & slice potatoes. (In the pictures I halved the recipe since it's just the hubby & I. We had plenty, including leftovers.) Brush each side with butter then place in oven.
Bake 35-40 minutes, flipping half-way through. Top with cheeses & bacon pieces.
Bake another 5 minutes until cheese is melted.
Yumbers!