Search This Blog

Showing posts with label jewelry. Show all posts

Monday, March 26, 2012

Washer Necklace

I wanted to see if I could make something without spending a dime this week. I used a bunch of left-over materials & borrowed (read: stole) a little something from my hubby to make this necklace:
You'll need:
a washer
scrapbook paper
leather cording
EnviroTex Lite pour-on (can be found in the craft department)

Cut the scrapbook paper to match the size of the washer.
Place the paper on top of the washer. Following the directions on the box, apply EnviroTex pour-on. I used a Styrofoam bowl & a cap to an old bottle of hairspray to contain the excess and elevate the washer.
Once set (my box said to let sit for 24 hours), wrap leather cording around washer to create the necklace. You can use a clasp if you wish, but I decided just to tie a knot in the cording.

Monday, March 12, 2012

Knock-off Week: Calvin Klein bracelet

I am all about being frugal. I've said many times, "Don't buy what you can make." This week is dedicated to proving that you don't have to buy everything. Sometimes going the cheaper route is best.

I love jewelry! Even using "love" is still a bit of an understatement...ask my husband. I have so many necklaces, earrings, bracelets, rings, etc he complains a bit every time I open my jewelry box. I must admit though, most of my pieces I get at really good prices, but I knew that he would flip out if I paid retail for this beauty:
Source. $100!!!
Yeah, he would have flipped his lid on that one. So...I decided to try my hand at making something similar for about a 1/10th of the cost.


You'll need:
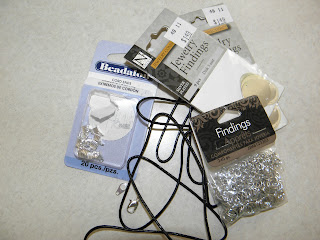
6-8 inches of black leather cording, depending of desired length
jump rings, I used 62
round disks (you can find these near the jump rings), I used 10
1 clasp, I went with a lobster clasp
2 cord ends


Fasten 1 cord end to one end of the cording. Attach one half of the clasp. This will help the jump rings and disks not slide off while you're working. Slide on jump rings and jump rings with disks attached to them (or loaded) onto the cording. I alternated using the following pattern: 5 empty, 1 loaded, 6 empty, 1 loaded, 5 empty, 1 loaded, 6 empty, 1 loaded.... until I reached 10 loaded jump rings. Then I ended with 5 empty.
Attach the other cord end and use a jump ring to attach the other half of the clasp.

Friday, February 17, 2012

Feather Necklace

I didn't realize how long it's been since I posted a craft! My apologizes. Hopefully this:
The necklace, not the mannequin. 
will make up for it.
Remember when my camera ate the pictures of my brown sugar apples? Yeah, well, I was doing this at the same time so all pictures are kaput. However, if you click on the pictures that are posted, you can get a bigger view of the images. Sorry!

Needed:
1 meter in chain
2 feathers
spray paint
2 crimp beads
2 jump rings

Spray paint the feathers. I chose silver. I don't like the way gold looks on me.
Once dry, apply a crimp bead onto each feather. There are several different styles, I think these
Source
are easier to work with, especially since I'm new at making jewelry.
Using jump rings, attach the crimp beads to the necklace.

Wear that bad boy!

I found the craft feathers worked okay, you just have to make sure to choose some stiff ones. The spray paint can make the fluffy ones do weird and ugly things.

Friday, December 30, 2011

Embroidery Floss Bracelet

I saw someone come into my *real* job the other day and was wearing a cute bracelet. I asked her where she got it and she said she made it. She got the idea from pinterest. I took a look at it & knew I could make it too!
You'll need:
Embroidery floss
Charm that has open middle and is closed in some way (when you see it, it'll make more sense)

Cut 2 18in lengths of the embroidery floss & fold each in half. Pull folded end through the charm.

Loop the loose end through the folded end:

Repeat on the other side. This is where the lady's bracelet ended, but I wanted to take it a little bit further.
I took 2 silver beads & threaded one through each piece of floss & tied a knot.
I then tied a knot towards the end of each piece of floss, put on a bead & then tied anther knot.
Here's my finished product:
I love it! I'm by no means a jewelry maker, but this was so easy & I love the look of it! Trust me, if I can do it, anyone can!!