I thought my first tutorial from my looooong absence should be one that's super cool & really helpful. So I decided to help you guys out with some HDR images!!! Aren't you excited?!
HDR stands for high dynamic range. You know how you take pictures of something and there are areas that are so white you can't see anything and other areas that are so black you can't see anything? I'm here to help! Now, this doesn't work if you're photographing people, but this is really great for things like...I dunno....a pier. (We have lots of those around.)
Keep in mind these directions are for Photoshop. Speaking of, have you seen this? Seriously, take a look.
You'll need:
camera
tripod
PS
time
patience
Trust me. Do not do this without your tripod.
Figure you what you want to shoot...like I said, I'm going for the pier. Set up your tripod...I'll wait...seriously don't do this without a tripod.
Set your camera to manual.
Figure out your aperture: do you want the whole thing to be in focus? I set mine to f/22 because I did.
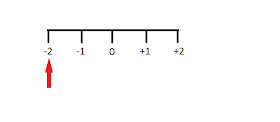
Set your shutter speed to under-develop your picture. The scale in the viewfinder should look like this with your first picture:
Set your camera to a 2 second or longer timer (or use a remote) & press the shutter. Without moving the camera, change the shutter speed until your scale looks like this:
Enjoy the rest of your beach visit:
Once you're home & nursing your latest sunburn, open the files in Bridge. Select the ones you want to include in your HDR image. To create the HDR image, go to your "Tools" button on the menu bar, go down to "Photoshop", then to "Merge to HDR Pro". Let the computer do its thing...it can take a while. Go get a snack...or reapply some aloe.
When you come back it will look like this:
Keep playing with it & try other locations. I think it adds a whole other dimension to photography. I've been tweaking one for a few days now:


No comments:
Post a Comment